
Hiking Mt Fuji Overnight To See The Sunrise: My Experience
In recent years, an average of 300,000 people have embarked on hiking Mt Fuji, whether during the day or overnight, to see the sunrise!
Many people, including me and my friends, have a specific plan of hiking Mt Fuji Overnight to see the sunrise. And whether the weather is on your side or not, seeing the sunrise, it’s quite an incredible experience a
With the increasing number of people wanting to climb Fuji-San, new rules have been implemented to start the climbing season in 2024.
Read more: Hiking Mt Fuji Overnight To See The Sunrise: My ExperienceThis year, I am living on a working holiday visa, and I want to do many things during this WH, including hiking Fuji-San. So, I did, and here is how it went for me and what tips I have to share with you from my experience to help you plan your Mt Fuji hiking experience!
When Is Mt Fuji Hiking Season?
It is possible to hike Fuji-San each year, usually between early July and September when the official climbing season starts and ends.
Please respect the official hiking dates and do not attempt to climb Mt Fuji outside the season; many people have injured themselves or, worse, died hiking it outside the official season. So please follow the rules and don’t hike when you’re not allowed.

How Many Trails Are There?
There are four main trails to ascend Mt Fuji, each with distinct features. The most popular is the Yoshida Trail (Yellow Trail).
The Yoshida Trail starts at the Fuji-Subaru Line on the 5th Station at 2,300 (7,546 feet) meters of altitude on the northern side of Mount Fuji in the Yamanashi Prefecture. Many first-time climbers, including my friends and I, take it to ascend Fuji-San.
The other three trails are:
- Subashiri Trail (Red Trail): This is the second most popular option. It starts at 2,000 meters on the eastern side of the Subashiri 5th Station and is accessible from Shizuoka Prefecture.
- Gotemba Trail (Green Trail): It is said to be the least crowded of the four trails. Starting at Gotemba 5th Station at 1,400 meters (4,593), it is also the longest and most challenging trail, with fewer facilities than the two above.
- Fujinomiya Trail (Blue Trail): This trail is the shortest. However, the route to the summit can be steep. The start is located at Fujinomiya 5th Station at 2,400 meters (7,874 feet)
Of course, you can also ascend Mt Fuji directly from Station 0. This was our initial plan, but we quickly ruled it out. I am happy we did as it was, though!
Another longer option that some hikers take is to hike from the sea to the top of the mountain over the course of a few days!

What Are The Rules For The Yoshida Trail in 2024?
Due to its popularity, the Yoshida Trail implemented some extra rules for people who wish to hike Mt Fuji and pass by this trail to regulate the number of people who pass by.
Also, some common-sense rules that apply to all trails are not to litter and respecting the established rules and your fellow hikers.
What To Pack To Hike Mt Fuji?
Here, you’ll find a list of everything you need to hike Mt. Fuji and extra items necessary if you plan to hike Mt. Fuji overnight.
Some might seem obvious, but some people hike without proper equipment and end up injured, so I think a little reminder doesn’t hurt.
- Frontal lamp: (I forgot mine and had to tie my iPhone to my chest; it worked well, but I do not recommend it!)
- Hiking Boots: Sturdy, waterproof boots with good ankle support are essential for Mt Fuji’s rocky and uneven terrain.
- Raingears: If it rains, you will feel miserable, and you must keep dry. Have rain pants and a jacket ready!
- Snacks & 2L Water: don’t overpack, though you’ll have to carry it.
- Heatech layers: are amazing and cheap to get here at UNIQLO or GU.
- Extra Socks & Thermal socks: in case your first pair gets wet, it’s nice to have a replacement or heatech socks (I love UNIQLO heatech items, in case you couldn’t tell)
- Backpack: It should be large enough to carry all your gear but lightweight. A rain cover for your backpack is also useful.
- Earplugs and Eye Mask: Mountain huts can be crowded and noisy, so earplugs and an eye mask can help you rest better.
- Sunscreen and Lip Balm: UV rays are strong at higher altitudes, even on cloudy days.
- Sunglasses: To protect your eyes from glare and UV exposure.
- Cash: Bring enough cash and 100 coins. You’ll have to pay for the toilet or any additional services at mountain huts or for the stamps on your climbing stick.
- Personal Hygiene Items: Toothbrush, toothpaste, and other basic hygiene necessities like wipes etc.
We went a bit too heavy on the snack. I think we thought we would starve or something, but that was not the case. I ate most of them by the morning, and that night’s climb was challenging!
Things To Know Before Hiking Mt Fuji Overnight
- Book your accommodation ahead of time. You cannot climb overnight without booking a hut. No matter how skilled you think you are, it would be irresponsible and very stupid. That’s how accidents happen.
The booking of the huts usually opens around April. - Book your way in and out: If you’re travelling from Tokyo/Kawaguchiko to the 5th station, make sure to book your bus tickets in advance, as they sell out quickly.
- Don’t book a return bus too early! Allow yourself extra time to catch your bus back to Tokyo. It’s better to wait at the 5th station for your bus than to almost miss it (as you’ll read below, that almost happened to us)
- There is an entrance fee to start your hike from the 5th station, as of 2025 the fee is 4000 yen, when we went in 2024
Hiking Mt Fuji Overnight To See The Sunrise: My Experience

Our hiking Mt Fuji Overnight Journey started on the 3rd of July at 10 am at Shinjuku Station, where we took the bus to the Yoshida 5th Station; we arrived there around, which I believe is a good time as it was time to have a quick lunch, buy some sticks (essential imo, especially if you love collecting stamp in Japan)
The first leg of the hike was actually really easy; I think if I were to redo it, I would book my hut on the 8th station so that you’re slightly *closer* to the summit when it’s time to go again. It is more comfortable to hike during the day when you have had a good night’s sleep previously.
We stayed at the Fuji Ichi-kan mountain hut. When we checked in, they gave us a meal ticket, and we returned later to have a nice steak curry rice meal. Before that, we were resting. Well, my friend was asleep, and I admired the view from the bench.


We took a break between 17h (5:00 pm) and 23h40 (11:40 pm) where I barely slept, I barely got any sleep, I was afraid we wouldn’t hear the alarm, and I also didn’t want the alarm to go off as well; we were sleeping in a hut and not everybody want to left in the dead of the night to hike and see the sunrise. My friend, however, had no issue sleeping…
We set back out a bit before 00h to meet up with my friend who was staying at the 7th Station Tomoe-Kan, a little bit higher. I had layered quite a bit then, but it was still way too hot to have 4 layers, so I quickly removed my jacket.
Also, with some altitude and no sleep, I felt out of breath faster than before.
Watch my Mt Fuji Vlog


Making some progress!
It was my first time hiking at night, and it was quite an experience.
We reached the 3,250m mark and continued our way. It was getting more and more tiring, but it was still manageable. After a while, the crowd started to form, which slowed us down as we had to wait, but that wasn’t the worst.
The worst part was the strong winds that started to pick up and the rain.
It was quite painful to get hit by pebbles when the wind gusts would hit hard. Due to the weather it was taking us a lot longer. It got quickly quite foggy, so by that time, we figured we wouldn’t see the sunrise, and we were right…
The weather on Mt Fuji can change very quickly so you’ll either get lucky or not. Sadly for us, it was the latter.
The last 200m were the worst, in my opinion. Although we had a good headstart, the weather and fatigue slowed us down.
I will not lie; the rain and the cold made it miserable, and we thought maybe we should stop here. We stayed for a bit at the 9th station, which, honestly, isn’t much—just a bunch of rumbles.
We somehow made it to the top of Mt. Fuji. The wind was even stronger, and with the rain, it felt cold, so we didn’t stay long. Also, the crater wasn’t visible because of the fog.
We got quite lucky at some point, though. All of a sudden, when we had started to make our way down and were on a break at the 9th station, the sky was clearer up, and it was beautiful. But it was back to the foggy weather in 5 minutes or less.
Luckily, that didn’t last, so we could walk while admiring the view. The view over Kawaguchiko and the whole area is genuinely stunning.
Heading back to the 5th Station
Due to the strong gust of wind, we couldn’t head back to the 5th station passing by the easier road, which would have saved us a good chunk of time. We had to head back from where we arrived, fortunately the weather eventually cleared out and we were able to join that path, it is easier but also hard as the rocks rolling under your feet can easily make you fell flat on your bum.
It happened to me 3 times, thanks to the guy who helped me get back up the last time as I fell without fighting it as I had just given up.
We met with one of the mountain guys. My friend asked how long to take to the 5th station until this point, and he told him that we were a good 3 hours away, which would make us miss our 10 am bus reservation.
We tried to hurry, but damn, it was getting quite hot again, and the road wasn’t ideal for walking fast with all the rocky ash pebbles.
We took breaks every now and then to both rest and remove the multiple rocks that go into your shoes when you try to go down by putting your heels deep in first and going at a steady speed. It works better, but the number of rocks that get into your shoes is insane.
Also, after a sleepless night and a strenuous hike in bad weather, we were obviously not the fastest.
When we reached a more stable part of the path, we decided it was time to speed up. The sign said we were still 75 minutes away from the 5th station, meaning we would make it to the bus station at 10:05, but we ended up doing it in 60 minutes. I thought we were going to lose my friend a few times, but he also made it and even had time to go buy omiyage for his coworkers before we got on the bus.
The moral of the story: Don’t book a too early bus. We thought we would reach for sunrise and have plenty of time to spare to make it back to the 5th station by 10 am, but that was very limited.
Allowing extra time and waiting more at the 5th station would have been better than pushing ourselves. But the idea of missing the bus with the next one probably fully booked wasn’t appealing.
Conclusion On Hiking Mt Fuji At Night
To conclude this post, I’d say that while it’s not a hard hike, it is definitely strenuous. I hike every now and then, but I walk a lot, and even more when I was living in Japan, as I wanted to make the most of it. However, I felt exhausted by the end of it, especially with the bad weather and strong winds. People would say it’s an easy hike, surely it’s not the hardest but I wouldn’t qualify it as easy either.
This is a wrap on my journey hiking Mt. Fuji. While I am a bit disappointed we didn’t get to see the sunrise from the top, I am still glad and proud we all made it to the top; it’s quite a unique and unforgettable experience that I am grateful to have been able to have!
However, I think I’ll attempt to hike Fuji San overnight again in the future, hoping that this time will be the right time and I can see the sunrise; after all, it is the ultimate reward!
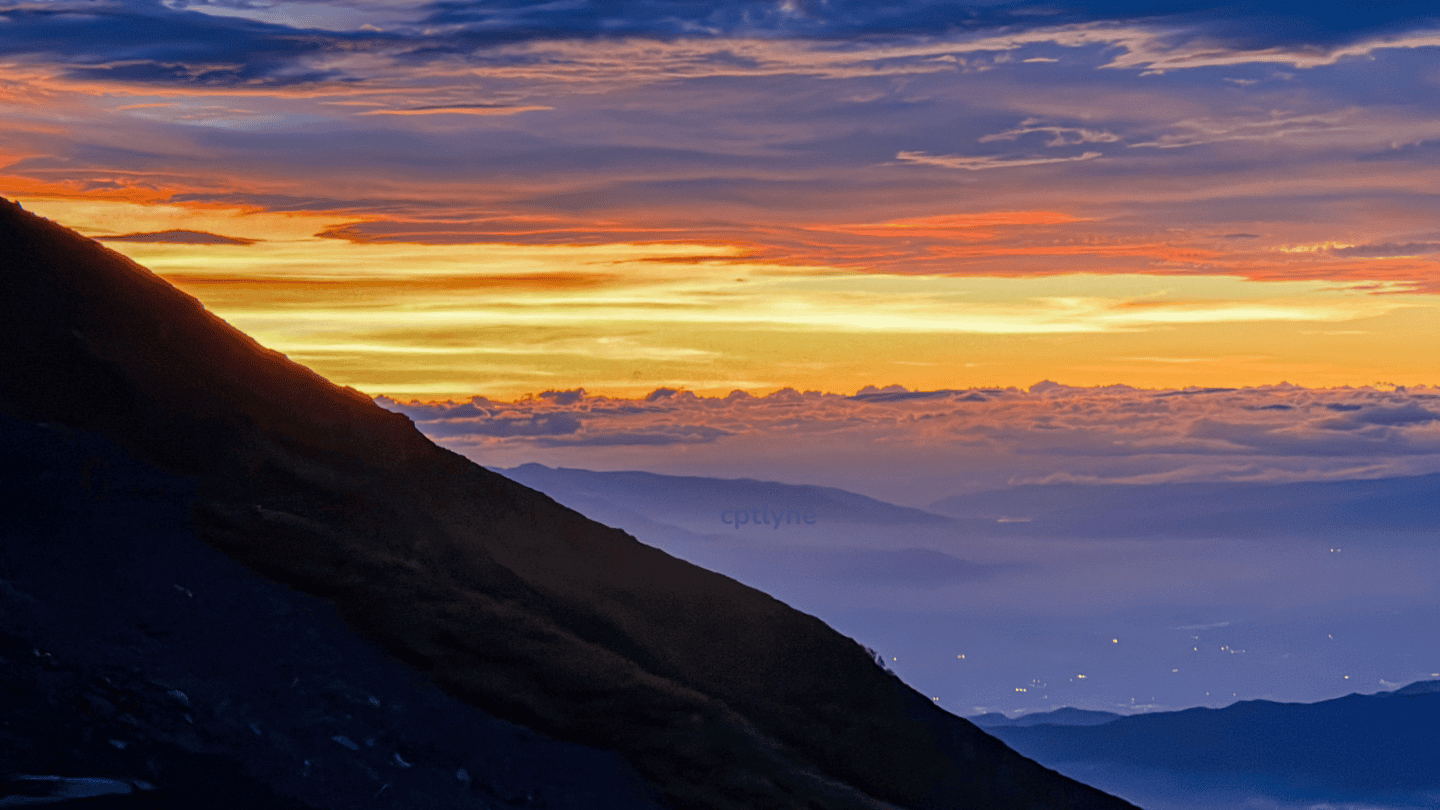
With the beautiful sunset from our accommodation at the 7th station, I know seeing the sunrise after the hike from the top of Fuji-san would be amazing. So, until next time, Fuji-san!
Also, follow me on Instagram to check out my travel adventures around Europe and more lifestyle content @cpt_lyne!
Are you looking for more Japan Travel Content? Then please check out the rest of my Japan travel guides for some travel inspiration in this beautiful country:
- First Time In Tokyo Travel Guide
- Mt Fuji Day Trip Tour
- Ride SL Paleo Express in Chichibu
- How To Spend One Day In Kagoshima City
- Kagoshima 3 Days Itinerary
- Day Trip To Nara from Kyoto
- How To Spend One Full Day At Universal Studio Japan, Osaka
Did you enjoy this post? Please share it on Pinterest!
Hiking Mt Fuji Overnight To See The Sunrise: My Experience


✈ Best Travel Ressources To Plan Your Next Trip
✈ How To Find Flights?
– Skyscanner; it is a good comparator for finding the cheapest flights.
– Google Flights is also a good help when comparing flights.
✈ Where To Book Accommodations?
– Booking.com: plenty of options and ways to get discounts the more you book.
✈ Best Sites To Book Activities
– GetYourGuide when I can’t get a ticket directly on the website or if it’s easier to go through them.
– Klook if you need to book more than just activities and would like to get everything from the same website or different day trips—(i.e. transport cards, car rental, hotel…).
✈ Other helpful travel resources
– Radical Storage: If you need a place to keep your luggage for an extended period when you travel, I recommend using them.
– TheTrainline: If you love to travel by train like me, then TheTrainline needs to be your go-to website for train travel in Europe.
————————————————————————————————————-
Disclaimer: This resources box contains affiliate links, which means I earn a small commission if you book anything through my links at no additional cost. These links help me support the blog and generate more content. Happy travels!
Hey there! This post may contain affiliate links. It means I earn a bit of money if you purchase products through me, there is no extra cost to you and it helps me maintain this blog. Read more in my Privacy Policy


